Installing OpenBSD on the Pomera DM250
These are my notes and pre-built images for getting OpenBSD-current installed on the Pomera DM250, DM250X, DM250XY, and DM250US.
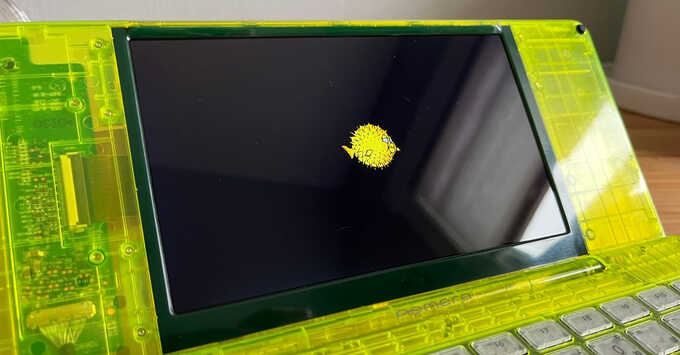
Table of Contents
Throat-clearing
Much of my work has not yet been committed upstream so installation currently requires a custom kernel and U-Boot images which are provided here. OpenBSD support is still improving and may not be stable at any given time. Install at your own risk. These risks include:
-
If the battery completely drains due to a software bug, the device may not power on correctly and will not be able to recharge its battery (see below).
-
If the device cannot boot properly into U-Boot, you may need to recover it through a USB cable which may also require having to open the device (see recovery).
Making a backup
This is optional but recommended. The tools and instructions at EKESETE.net should be used to make a full eMMC backup before doing anything.
Some DM250 hardware notes
-
The Japanese-market DM250, DM250X, and DM250XY all have the same internals: a Rockchip RK3128 SoC, 1 GB of RAM, 8 GB eMMC, full-size SD card slot, AMPAK AP6212A Wi-Fi and Bluetooth chip, and 1024x600 LVDS display. The newer DM250US uses a slightly different board that adds a standalone battery charging chip.
-
The DM250's factory U-Boot detects Right Shift + Left Alt being pressed immediately after power-on and boots the recovery Linux kernel from its
recovery_kernelpartition instead of its normalkernelpartition. The recovery kernel boots the initramfs image at therecovery_bootpartition which mounts the SD card and executes any_sdboot.shscript found at its root directory. -
If you hold Shift + Alt too long at power-on, it will instead boot its graphical factory hardware test program. The recovery kernel and script do not show any output on the console while they boot and run. Hold down Right Shift + Left Alt + Power and count 3 seconds, then let go and it should boot the recovery kernel and
_sdboot.shfrom the SD card. -
Once the new U-Boot image is written to the eMMC (even before going through the OpenBSD installer), the DM250 will no longer be able to boot the original Linux kernel or recovery. You'll need to boot something via EFI to write the backup U-Boot image to eMMC to get back to the factory software. See recovery for more information.
-
The Japanese DM250 models will not fully power off with a USB-C cable connected to power (even with the factory Linux software). This means even if you
halt -pand it powers itself off, it will immediately power back on. My U-Boot detects if the lid is closed when it first boots and if it's closed, it will halt the boot process. This way it doesn't boot into OpenBSD while it's closed on your desk trying to charge (though it will still be powered up to U-Boot). The DM250US does not have this limitation and can stay powered off while charging. -
A working battery is required to be able to provide enough power even with a USB-C cable connected. If the battery is completely drained, it may not be able to boot up far enough to get to U-Boot for it to be able to tell the charging chip to go into a higher charge mode. By default it does a trickle charge but because it will always try to power on as soon as it has power connected, it may quickly drain the power it just added to the battery trying to boot. In short, don't let the battery drain completely.
Making an OpenBSD installation SD card
These instructions assume you're running OpenBSD (any architecture).
You'll need an SD card of a few GB, which is assumed to be sd1 here.
-
Format an SD card with a GPT partition layout, making an EFI partition of at least 100MB and giving the rest to an OpenBSD partition.
# fdisk -ygb 204800 sd1
# echo -e "a\n\n\n\n\nw\nx" | disklabel -E sd1
# newfs /dev/rsd1a
# newfs_msdos /dev/rsd1i
# mount /dev/sd1i /mnt
U-Boot and OpenBSD will use that EFI partition as its firmware partition, but the original Pomera recovery software will see it as a normal MSDOS partition and run the
/_sdboot.shscript contained on it. -
Fetch the standard OpenBSD armv7 EFI bootloader to the SD card's EFI partition as
/efi/boot/BOOTARM.EFI.# mkdir -p /mnt/efi/boot # cd /mnt/efi/boot # ftp https://cdn.openbsd.org/pub/OpenBSD/snapshots/armv7/{BOOTARM.EFI,SHA256.sig} # signify -C -x SHA256.sig BOOTARM.EFI -
Fetch the appropriate U-Boot image to the EFI partition as
/uboot.img. These U-Boot images have embedded copies of the appropriate binary device-tree built from my Linux tree.For the DM250, DM250X, and DM250XY:
# cd /mnt
# ftp https://jcs.org/dm250/uboot.img
For the DM250US:
# cd /mnt # ftp -o uboot.img https://jcs.org/dm250/us-uboot.img -
Fetch this installation script to the EFI partition as
/_sdboot.sh. This will get executed by the factory recovery partition's boot system once the DM250 is booted into recovery mode. The script mounts the EFI partition of the SD card, backs up all of the firmware files from the eMMC to the SD card, makes a backup of the current eMMC U-Boot partition to the SD card, and then writes the new U-Boot image from the SD card to the eMMC.# ftp https://jcs.org/dm250/_sdboot.sh -
Switch to the OpenBSD partition of the SD card and fetch the latest OpenBSD armv7 snapshot disk images to it.
# cd / # umount /mnt # mount /dev/sd1a /mnt # cd /mnt # ftp https://cdn.openbsd.org/pub/OpenBSD/snapshots/armv7/{SHA256.sig,INSTALL.armv7,base79.tgz,comp79.tgz,game79.tgz,man79.tgz,xbase79.tgz,xfont79.tgz,xserv79.tgz,xshare79.tgz} # signify -C -x SHA256.sig *.tgz -
Fetch the current
bwfmfirmware so you can have working Wi-Fi after installation.# ftp http://firmware.openbsd.org/firmware/snapshots/{SHA256.sig,bwfm-firmware-20200316.1.3p5.tgz} # signify -C -x SHA256.sig bwfm-firmware-* -
Fetch my
bsd.rdramdisk image andbsdkernel.# ftp https://jcs.org/dm250/bsd{,.rd} -
Your SD card is now ready to go. Unmount it.
# cd /
# umount /mnt
Installing OpenBSD
Insert the prepped SD card into the DM250. If it's plugged into power, unplug it. If it's powered up, power it down.
Hold down the Right Shift + Left Alt + Power buttons.
As soon as the Pomera logo displays, wait about two seconds and let go.
The Pomera logo will clear and the recovery kernel should now boot.
It will execute the _sdboot.sh script on the SD card which will make a backup
of the existing U-Boot partition to the SD card and write the new one.
Nothing will be shown on the screen while it's working but it should only take
about 30 seconds.
Once it's done, it will reboot the device.
At this point it will boot the new U-Boot with EFI support and video and keyboard drivers for the DM250. If it detected the eMMC and SD card properly, it will boot the OpenBSD EFI bootloader.
No EFI variables loaded
Loading Boot0000 'mmc 0' failed
Booting: Label: mmc 1 Device path: /VenHw(...)/SD(1)/SD(0)
disks: sd0* sd1
>> OpenBSD/armv7 BOOTARM 1.23
boot>
Enter b bsd.rd to boot the installer.
boot> b bsd.rd
cannot open sd0a:/etc/random.seed: No such file or directory
booting sd0a:bsd.rd: ...
When prompted for the root disk, enter ? to see which is which.
The eMMC should be sd1 showing 7.3G.
If installing to the eMMC, use the whole disk option to let it create a new
MBR with an EFI partition offset by 16MB so it does not overwrite the Rockchip
ID block or U-Boot that live at the beginning of the disk.
You can accept the auto-allocated partition layout or just make one big root
and a swap partition.
When prompted for the location of the sets, specify disk and then respond no
that it's not mounted, and enter sd0 (the SD card), then partition a.
The pathname to the sets will be just /.
Continue installing, ignoring the error from signify.
The installer should automatically pick up the bwfm firmware and install it.
At the end it will try to re-link the kernel which is using the upstream kernel
object files, so it's important you copy the custom kernel back over /bsd.
Exit to (S)hell, (H)alt or (R)eboot? [reboot] s
To boot the new system, enter 'reboot' at the command prompt.

# mount /dev/sd0a /mnt2
# cp /mnt2/bsd /mnt/bsd
You'll also need to disable reorder_kernel which will run at each boot so it
doesn't revert the kernel back to the upstream version.
# mv /mnt/usr/libexec/reorder_kernel{,.disabled}
# echo -n > /mnt/usr/libexec/reorder_kernel
# chmod +x /mnt/usr/libexec/reorder_kernel
You may now reboot.
Post-Installation
The first boot will report an error about bwfm and loadfirmware.
You'll need to copy the firmware/nvram_ap6212a.txt file that was backed up to
the SD card's EFI partition when U-Boot was flashed.
# mount /dev/sd0i /mnt
# cp /mnt/firmware/nvram_ap6212a.txt /etc/firmware/brcmfmac43430-sdio.rockchip,pomera-dm250.txt
# umount /mnt
U-Boot is compiled with boot logo support, so you can put a bitmap in the EFI
partition's root directory as logo.bmp to show at boot.
To make it show the OpenBSD puffy logo, you can use
this image.
# mount /dev/sd1i /mnt
# cd /mnt
# ftp https://jcs.org/dm250/logo.bmp
# cd /
# umount /mnt
On the Japanese DM250 models, the two LEDs near the USB-C port can be toggled
once booted.
Create an /etc/rc.securelevel that sets them up so they are accessible from a
normal kern.securelevel:
# cat > /etc/rc.securelevel
#!/bin/sh
gpioctl -q gpio1 8 set out red_led
gpioctl -q gpio1 12 set out green_led
^D
#
After rebooting, they can be addressed with the gpioctl utility:
# gpioctl gpio1 red_led 1
pin 8: state 0 -> 1
On the DM250US, these LEDs are directly controlled by the battery charging chip and cannot be manually controlled.
Building a custom installation ramdisk
If you want to tinker beyond installing, you'll need a Git clone of my
OpenBSD rk3128 tree,
my
U-Boot pomera-dm250 tree
with video and keyboard drivers, and my
Linux tree
which contains the DTB source files.
This is optional and requires being able to compile on an armv7 machine (or cross-compile if you know how), or you can just download the latest image I've already built.
Fetch an existing bsd.rd, extract its installation filesystem, build the
RAMDISK kernel from my rk3128 tree, and then insert the filesystem into the
new kernel.
$ cd /tmp
$ ftp https://cdn.openbsd.org/pub/OpenBSD/snapshots/armv7/bsd.rd
$ rdsetroot -x bsd.rd root.fs

$ cd /usr/src/sys/arch/armv7/compile/RAMDISK
$ make config
$ make
$ cp -f obj/bsd /tmp/bsd.rd
$ rdsetroot /tmp/bsd.rd /tmp/root.fs
The /tmp/bsd.rd file is now a bootable installation image with a custom
kernel.
Recovery
If the device won't turn on, hold the power button for 10 seconds or so to fully power it off, then let go and press again for a few seconds to see if it powers on.
If the screen backlight doesn't turn on a few seconds after pressing the power button, the device is either completely dead or it's not able to boot to U-Boot. The RK3128 SoC can detect this failure and will go into its "MaskROM" mode. If you plug a USB-C cable between the DM250 and a computer, it will attach as a USB device:
ugen0 at uhub3 port 3 "vendor 0x2207 product 0x310c" rev 2.00/1.00 addr 9
With xrock you can upload a RAM initialization blob and a custom U-Boot image I made that automatically starts U-Boot's USB Mass Storage mode:
# xrock reset maskrom
# xrock maskrom rk3128_ddr_300MHz_v2.12.bin u-boot-ums.bin
The DM250 will initialize and you should see its screen turn on and print information about the eMMC. On the connected computer, a new USB Mass Storage device attach:
ugen0 detached
umass0 at uhub1 port 5 configuration 1 interface 0 "Rockchip USB download gadget" rev 2.00/7e.a4 addr 5
umass0: using SCSI over Bulk-Only
scsibus4 at umass0: 2 targets, initiator 0
sd3 at scsibus4 targ 1 lun 0: <Linux, UMS disk 0, ffff> removable serial.2207001074fa883802e6
sd3: 7456MB, 512 bytes/sector, 15269888 sectors
You can now directly address the DM250's eMMC over USB as if it were a USB disk.
If you want to go back to the original DM250 Linux software and you
made a backup,
you can easily restore those .img files by dding them to this new USB disk
at their proper offsets.
I made a
restore script
that automates this:
# ftp https://jcs.org/dm250/restore.sh
# sh restore.sh /dev/rsd3c
restoring to /dev/rsd3c, ok?
restoring uboot @8388608...
8+0 records in
8+0 records out
8388608 bytes transferred in 2.447 secs (3428119 bytes/sec)
[...]
If U-Boot boots far enough that the RK3128 won't go into its MaskROM mode but
not far enough to be usable, you can force it into MaskROM mode by shorting the
TP501 test point next to the eMMC chip while powering on.
See my
initial notes
for more information and pictures showing that.
And finally, if you end up in a dark room likely to be eaten by a grue, contact me and I will try to help get you back to a working state.