WiFiStation: A WiFi interface for the Cidco MailStation
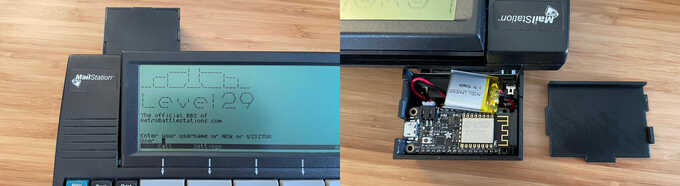
I've created an adapter for the Cidco MailStation Z80 computer which adds the ability to use WiFi for data transfer, code uploading, and to act as a WiFi modem for my msTERM terminal emulator.
Note: For the latest information on this project, please see my dedicated WiFiStation pages.
Table of Contents
Background
In 2019, I created a terminal program for the MailStation called msTERM which made it possible to dial into BBSes with the MailStation's built-in modem. While this was a fun project and allowed me to dial into to my own BBS, the novelty soon wore off and I returned to using telnet and SSH.
Last year, someone asked me if the MailStation could be used as a simple word processor similar to the AlphaSmart Dana. I told them such software could be written but it would be difficult to use since the only1 way to exchange documents with the MailStation would be through its modem or a parallel LapLink cable, both of which are difficult to use since most people don't have landlines anymore and similarly, most computers don't have parallel ports anymore.
While I had recently created a USB adapter to eliminate the need for a parallel cable, I thought it might be useful to have a WiFi interface instead. This would allow msTERM to "dial" out over telnet instead of its modem, just like the myriad of WiFi modem serial adapters, while also providing a simple web interface where users could upload files and have them transferred to the MailStation.
Data Transfer
Like those WiFi serial adapters, using an ESP32/ESP8266 seemed like the easiest solution. However, designing something that directly interfaced a ESP8266 to the processor seemed like a daunting task, mostly because I have no idea how to do such a thing but also because anyone that wanted similar functionality would have to tear apart their MailStation.
I settled on making an ESP8266 a standalone device and having it talk through the MailStation's parallel port, allowing it to work without any hardware modifications needed.
The MailStation firmware includes a built-in function for sending and receiving bytes over its parallel port, but it does so over five of the eight data pins, in three transfers, for every single byte. The USB loader that I had made earlier adhered to this protocol to remain compatible with the firmware function, making the loader program that runs on the MailStation as small as possible since its binary has to be hand-typed into the MailStation's hex editor.
This three-step process is not terribly slow, but it makes bi-directional communication more complicated and seemed unnecessary when all eight of the data pins were wired up. For WiFistation, I decided to use a much more straightforward protocol using all eight data pins plus two status and two control pins. The new loader for this protocol, which doesn't rely on any firmware functionality, ended up being 117 bytes vs. 97 for the original.
Prototyping
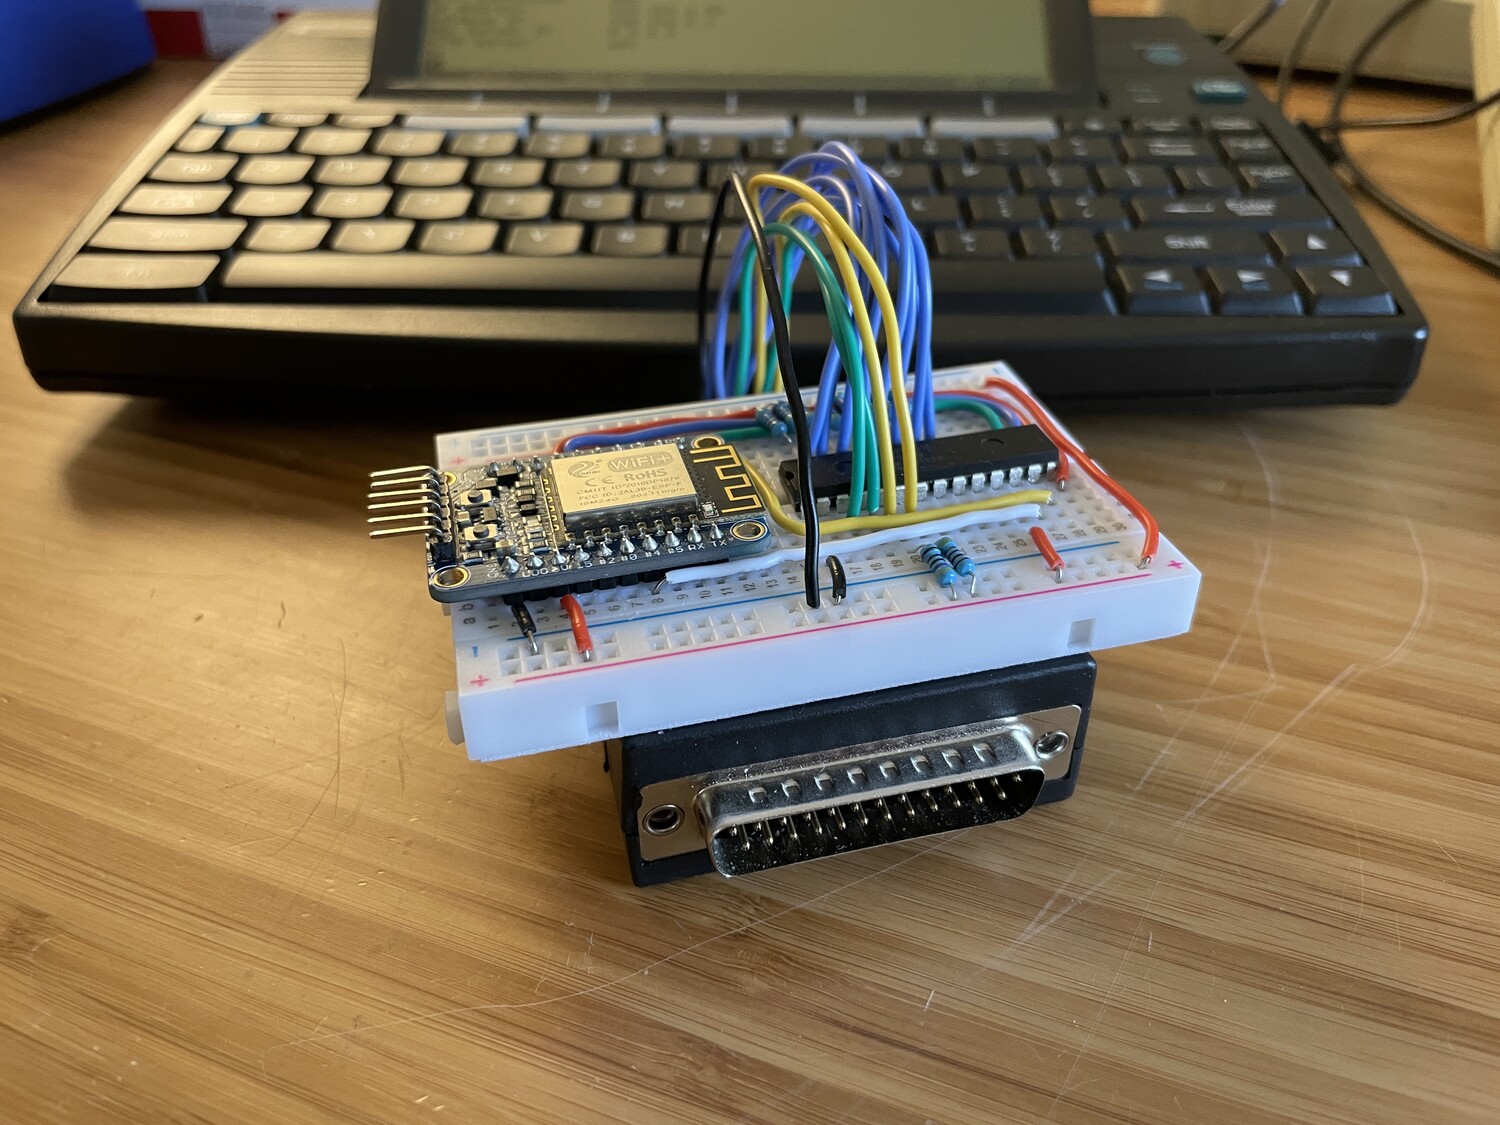
Earlier this year I assembled a prototype based on Adafruit's Huzzah ESP8266 board. To be able to manipulate 12 5v GPIO pins from the ESP8266 (which only has a few available GPIO pins, and they only operate at 3.3v), I used an MCP23017 I2C chip, which ultimately proved to be too slow to transfer large files (~16 KB) so I switched to the MCP23S18 which interfaces over SPI.
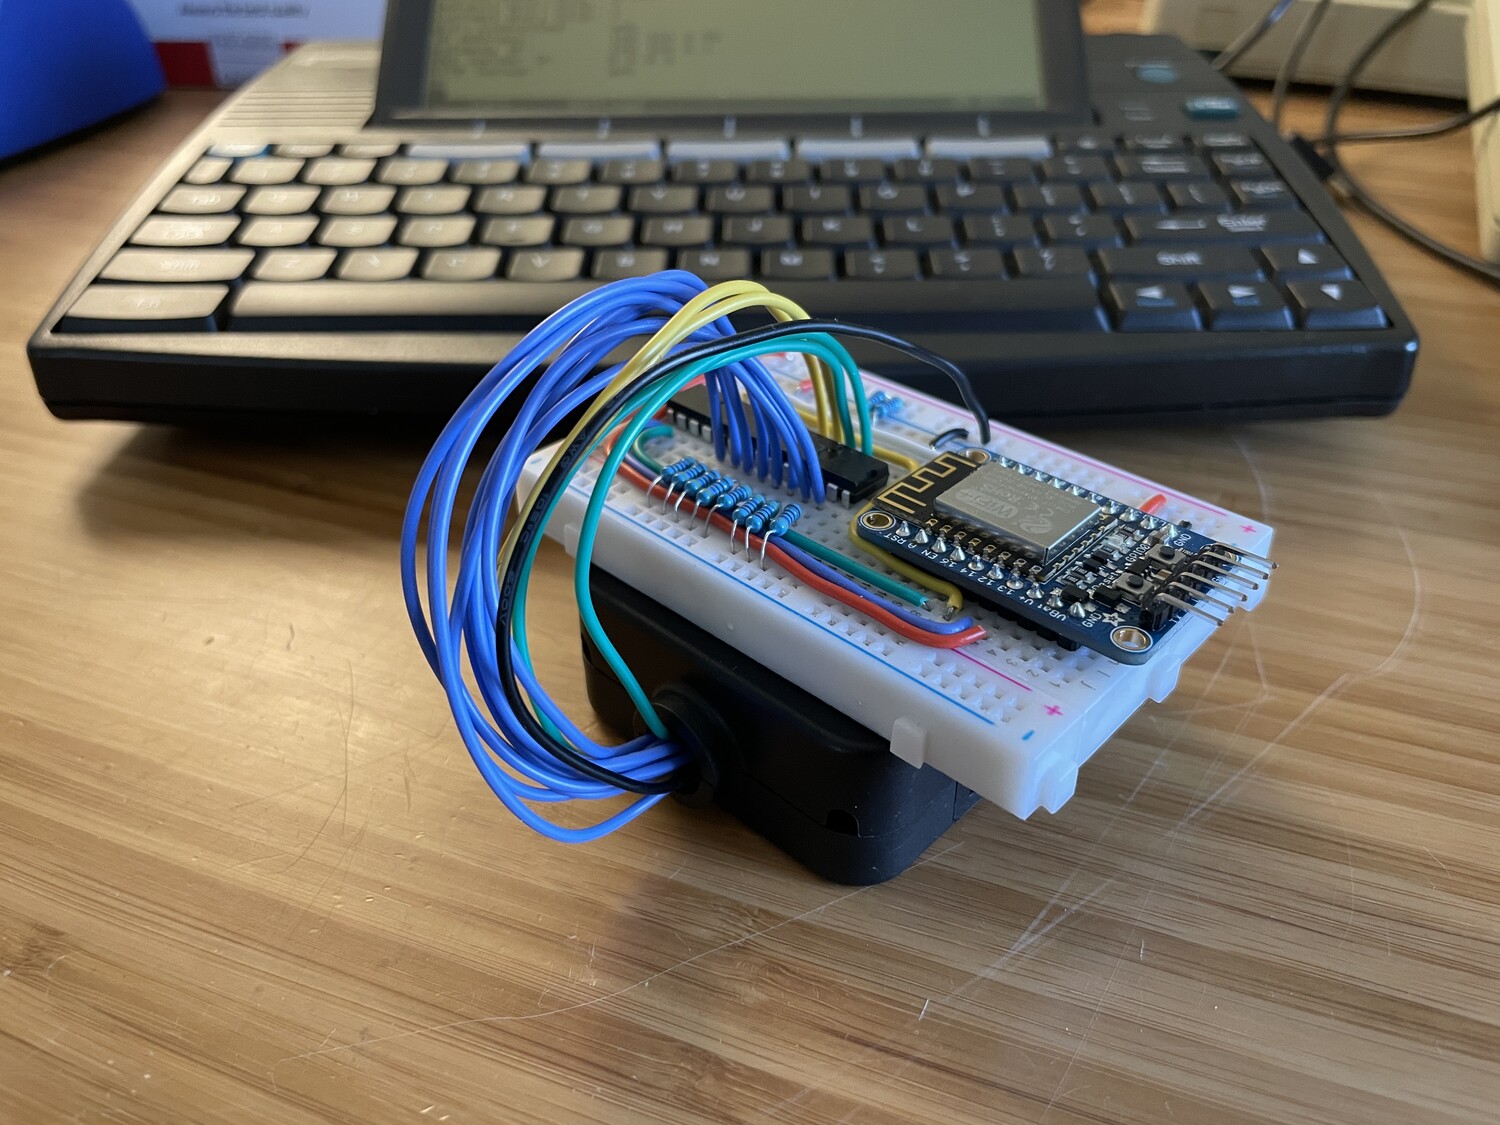
The prototype worked with the msTERM modifications I made, so I set about turning into something I could make available to others.
While the Adafruit Huzzah board had almost everything I needed, I decided to upgrade to their slightly larger Feather Huzzah board, which upgrades the 5-pin FTDI serial header to a proper CP2104 USB serial port and has built-in battery charging bits so the WiFiStation could optionally run from a rechargable battery. Since the MailStation can already run on AA batteries, this would allow the entire system to be portable.
Of course, only after doing all of my development and reflashing the original Huzzah board many dozens of times did I learn that the Feather version has auto-reset support so one can reflash it entirely from a command-line. The non-Feather version requires holding down two tiny buttons on the board to reset into its bootloader every time.
Designing a PCB
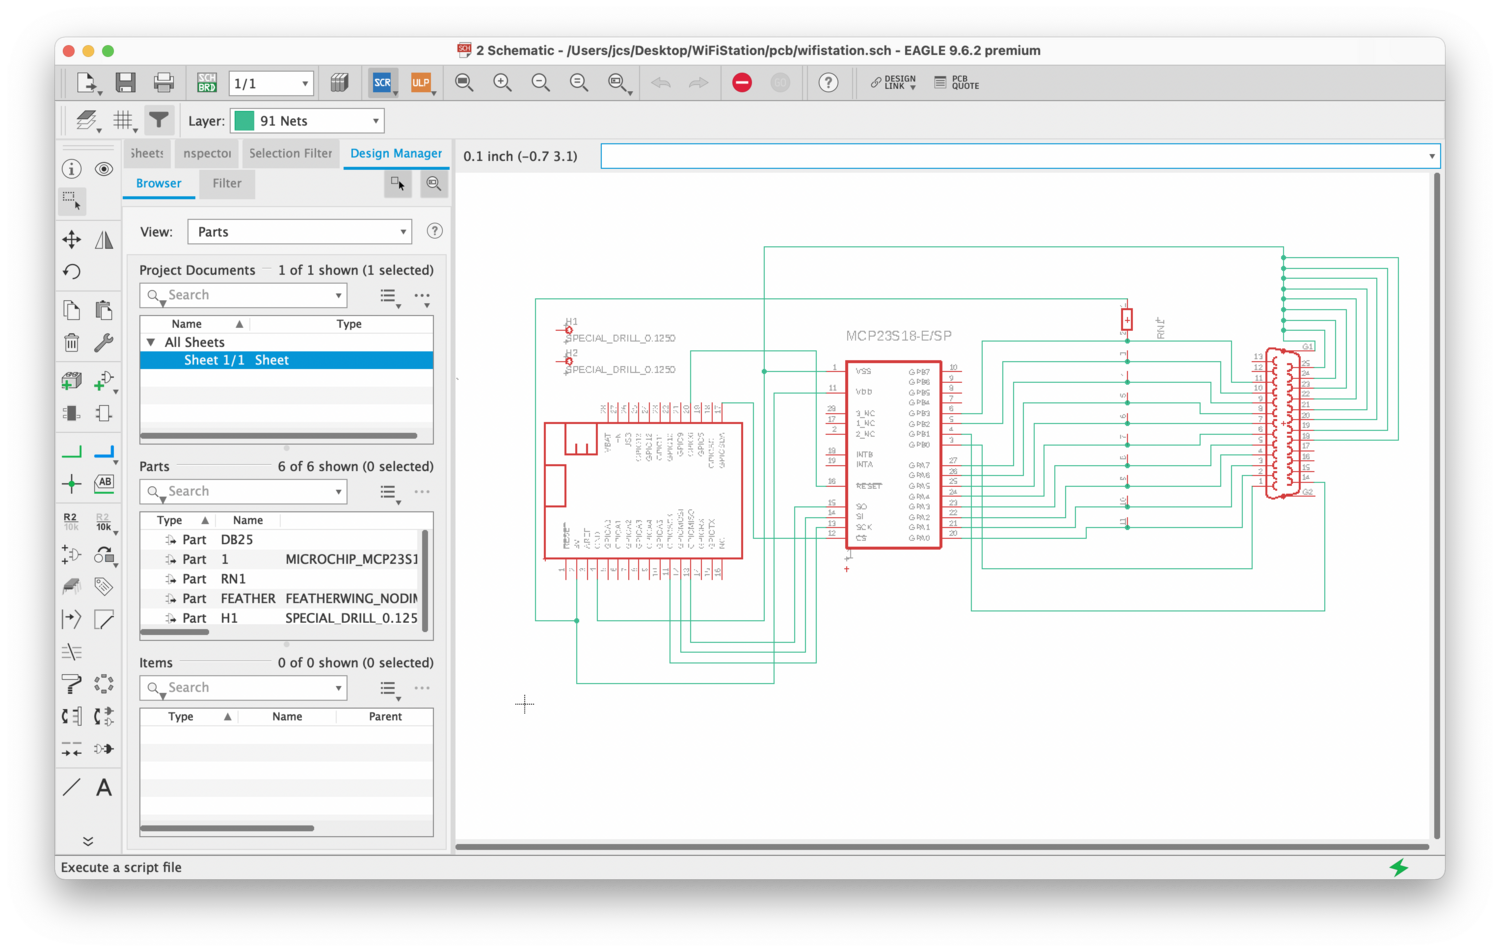
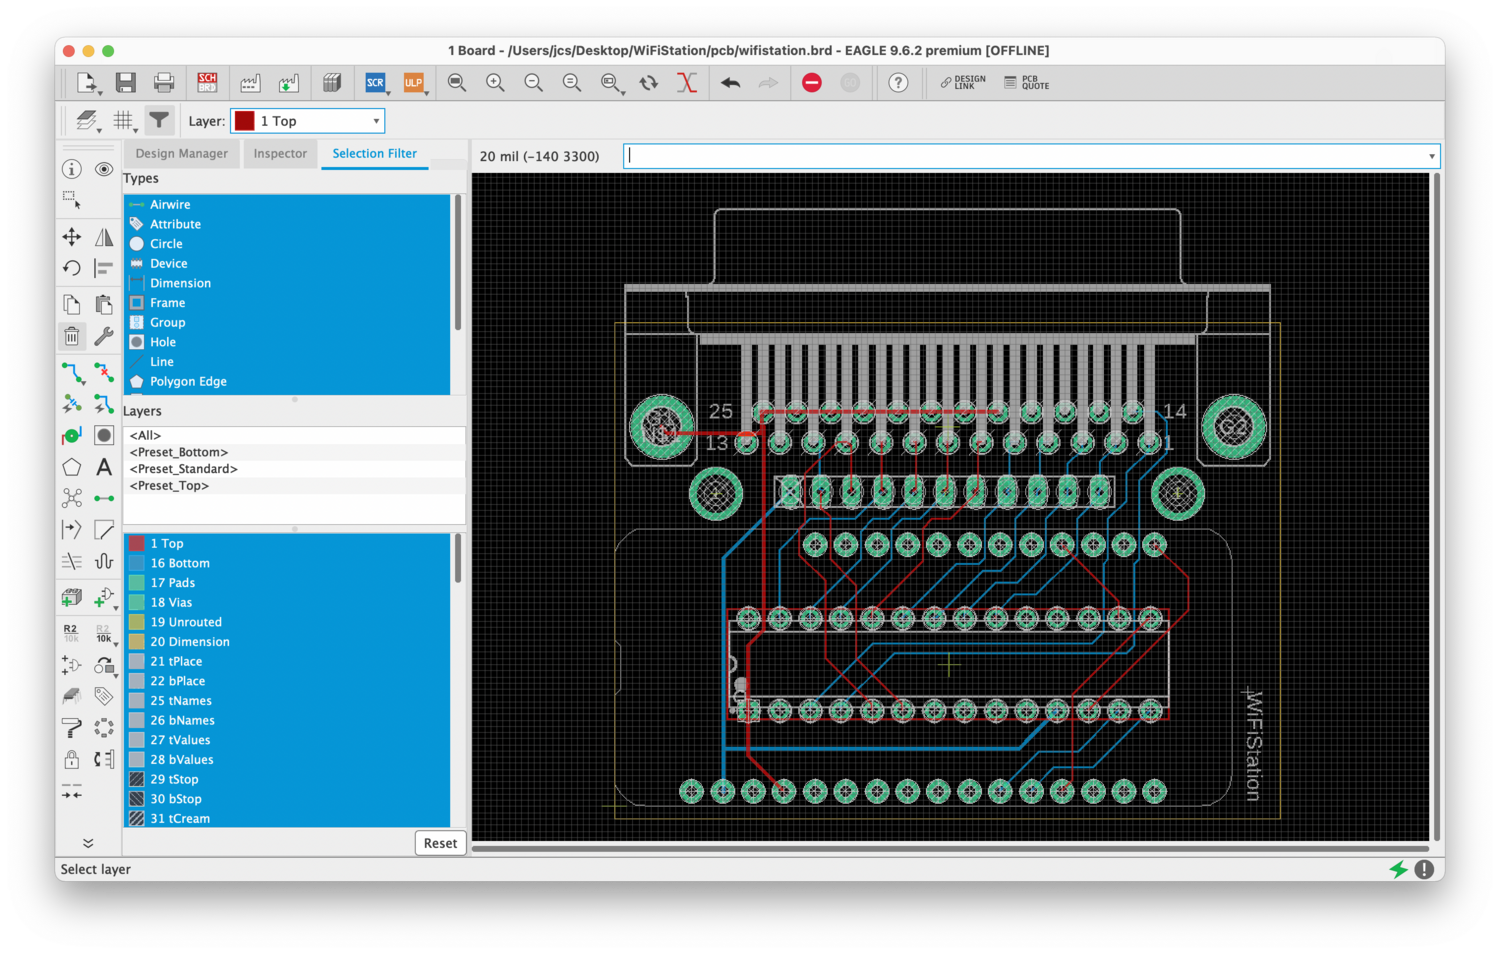
Since I am not a hardware hacker and have no background in electronics, turning my prototype into a PCB was a bit daunting. I downloaded the free version of EAGLE and stumbled through how to design a schematic and then turned it into a halfway-decent looking board. Since I'm also not comfortable doing surface-mount soldering, I opted for entirely through-hole components.
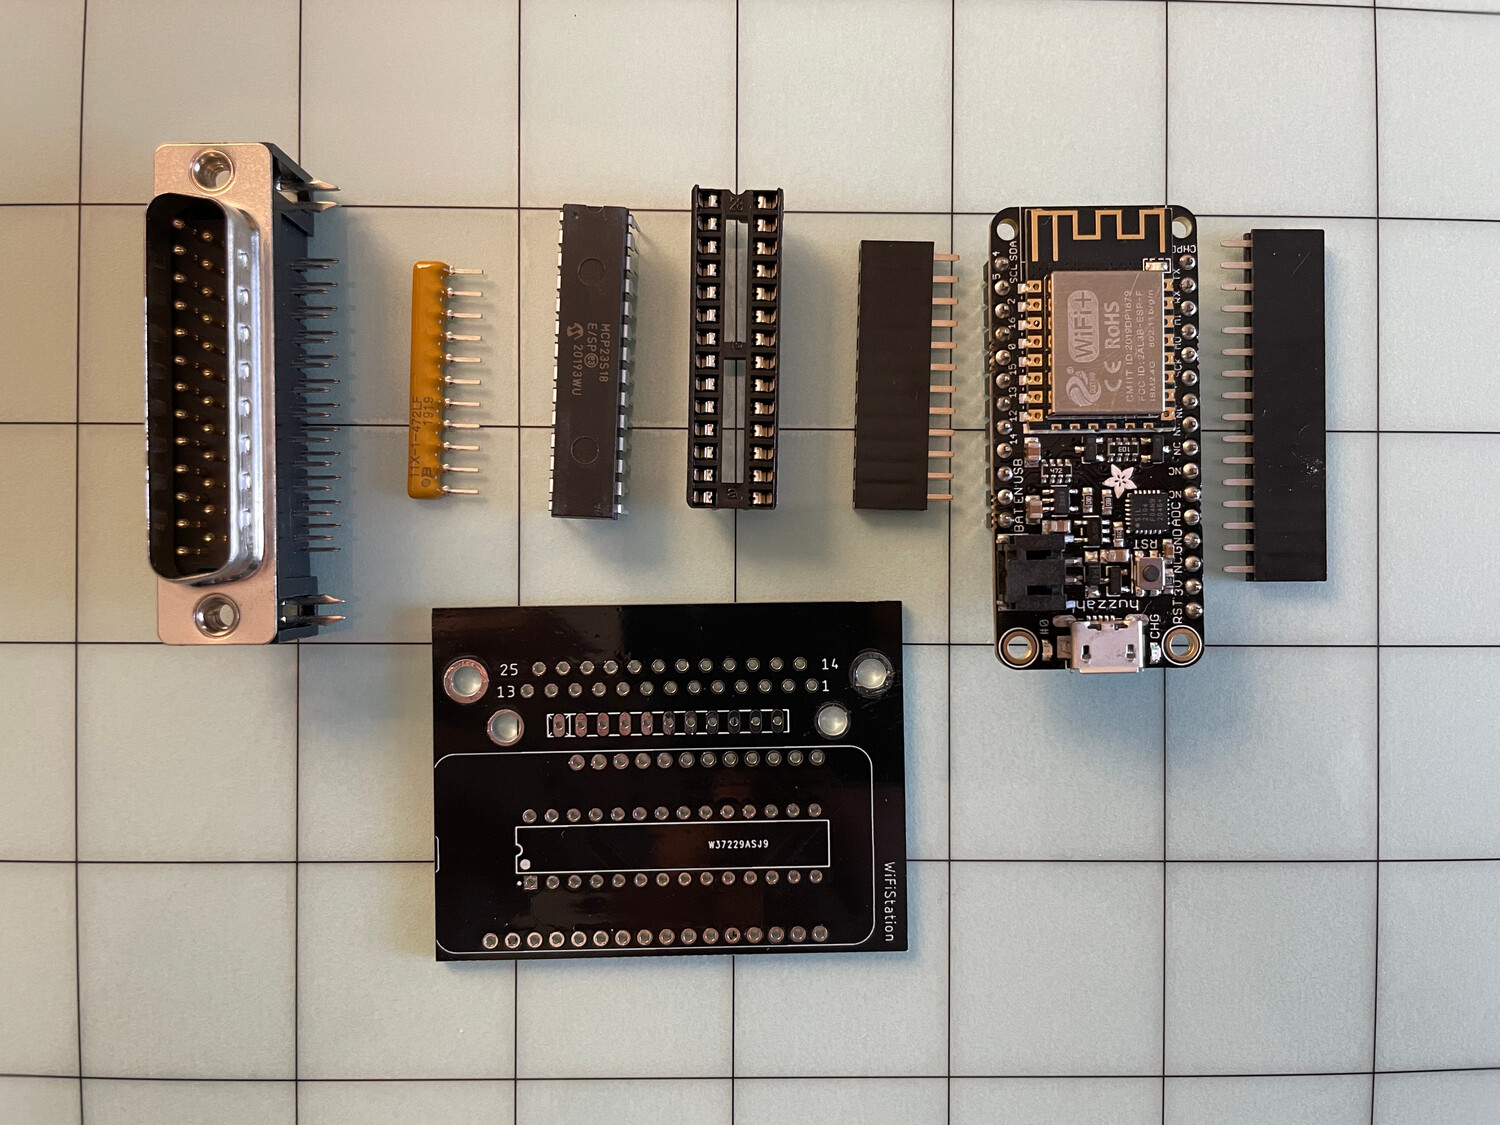
Once my initial design seemed sufficient, I uploaded it to PCBWay for printing of the PCB. I also ordered a handful of Huzzah Feather modules, DB25 connectors, resistors, MCP23S18 chips, and sockets from DigiKey.
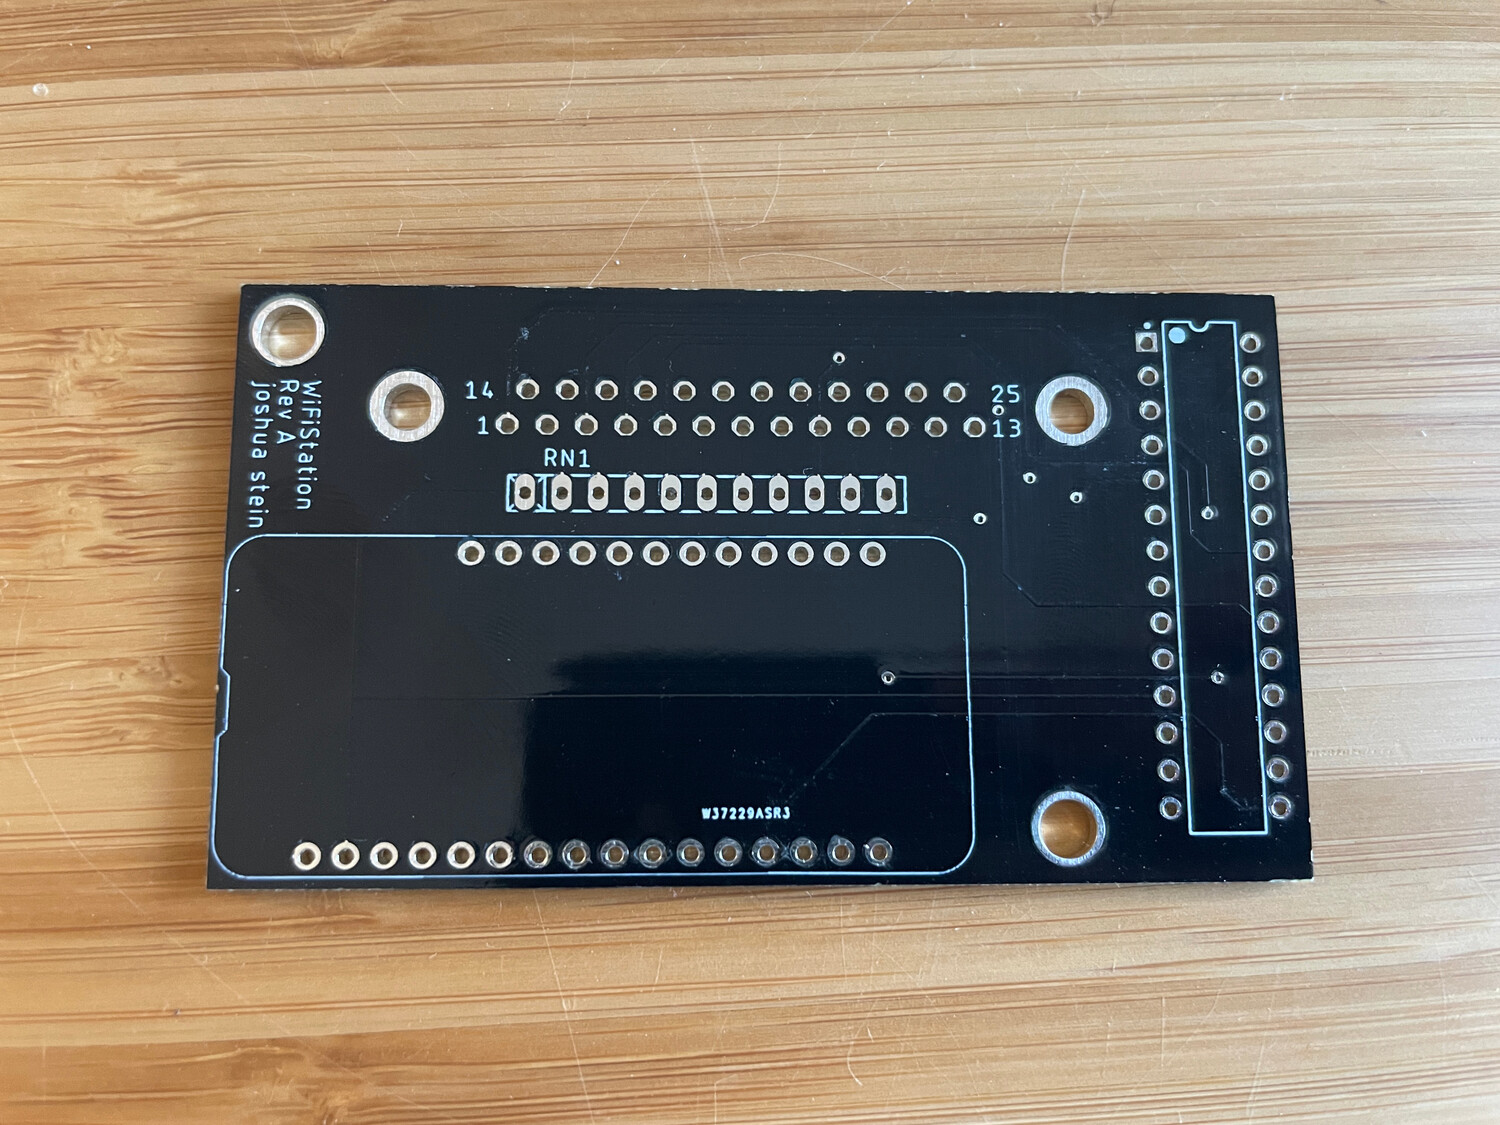
A week and a half and $25 later, I received my batch of five boards. I soldered the components to one of them and then spent a frustrating day trying to figure out why I was getting strange results with it.
As it turned out, the standard "SUB-D" DB25 part that I had picked in EAGLE had its pinout backwards from what I was expecting and how my prototype's breakout board was numbered, and I did not verify it carefully enough. I flipped the component around and rerouted all of the wires in the board design, which also allowed me to eliminate the vias, and then sent the new revision to PCBWay. Another week and a half later, I had my "revision B" boards.

This version produced the correct data on each pin, but was doing so inconsistently. I thought it might have been the bussed resistor that I chose instead of individual resistors like my prototype, but I later determined it to be the DB25 connector itself not being properly grounded.
I fixed this in the board design but as I started mocking up an enclosure for it, I realized that the DB25 connector was not placed proud enough on the board for a case to fit along the front edge without the pins being too far back. I also realized there was no way to securely fasten the two DB25 connectors together, as the MailStation has fixed screw nuts on it, but with the rear of the WiFiStation's connector being covered up, there would be no way to put a screw through it and tighten it down.
I came up with the idea to shrink the width of the board by moving the MCP23S18 to a horizontal position with the Huzzah straddling it, since the Huzzah was already sticking up high enough due to its pin headers. I also positioned the Huzzah Feather so that the DB25 screw holes were visible from the back of the board, allowing long screws to reach from outside the rear of the case, under the Huzzah board, and through the DB25 connector holes, into the MailStation's DB25 connector.
I finished this third redesign of the board and sent it off for printing.

Making the Case
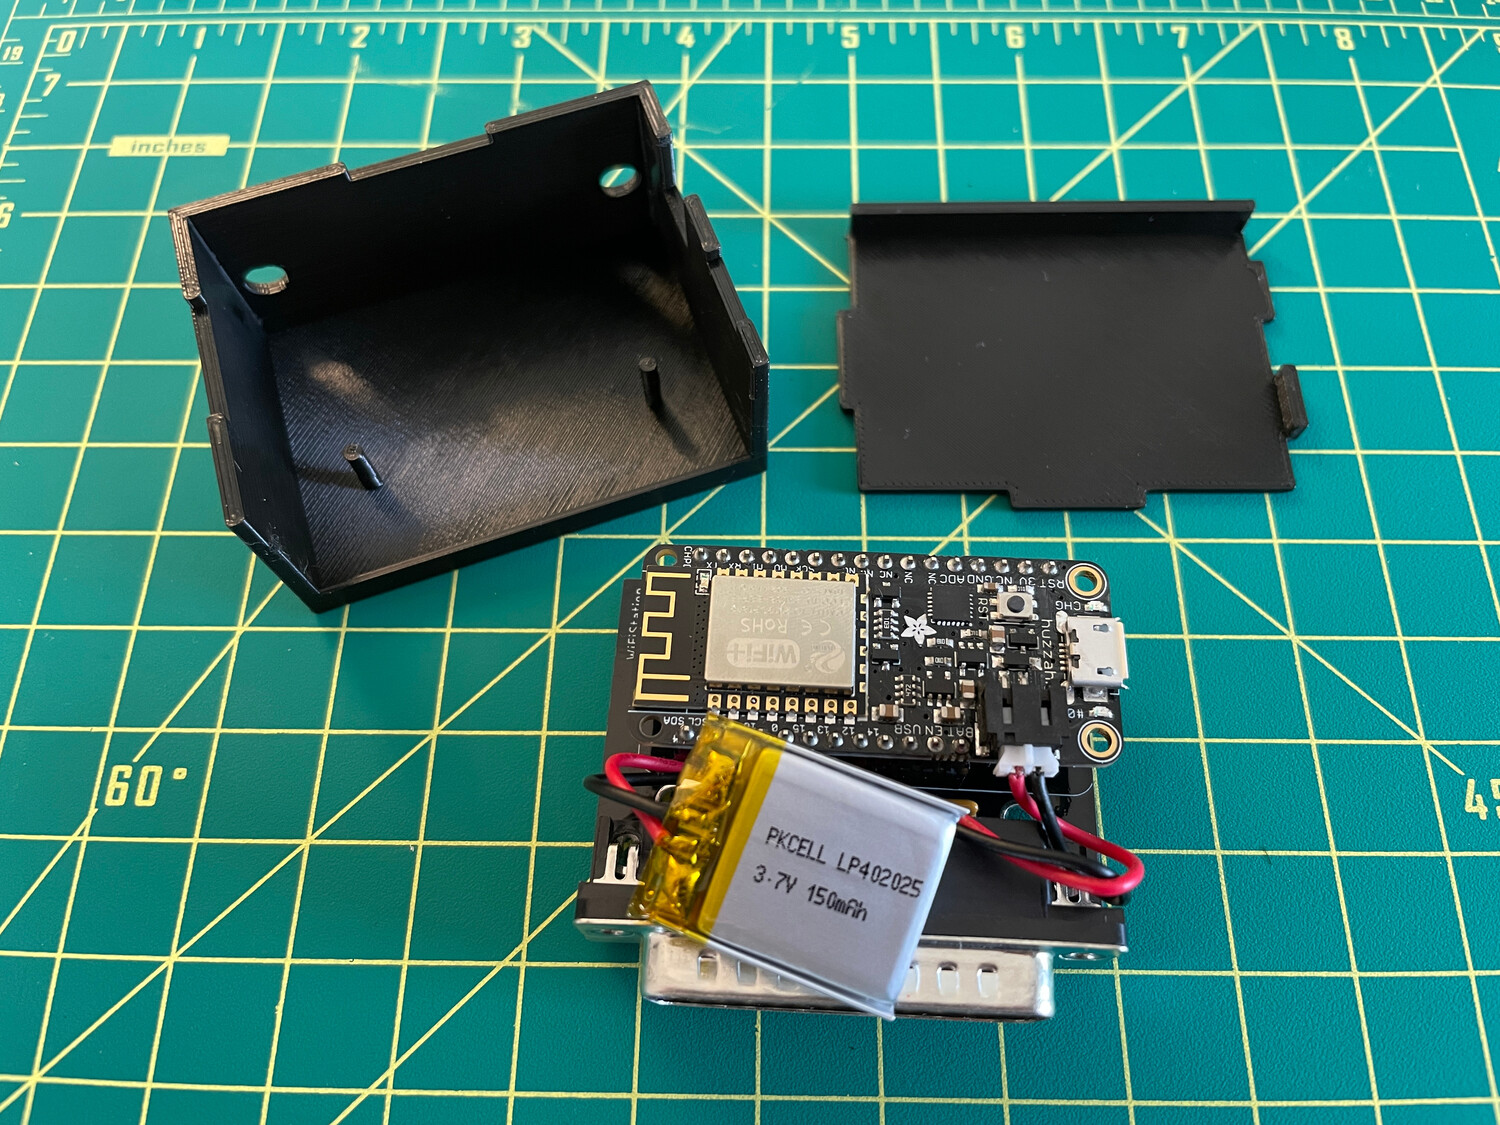
While waiting for the new boards to arrive, I needed an enclosure for them. As if fumbling through PCB design wasn't enough, I was also going to have to do some 3D modeling and printing. I designed a case for the WiFiStation in TinkerCAD and thankfully this didn't require a week and a half between iterations. I soon had a decent case that connected together and allowed an optional lithium ion battery to be housed in it as well.

I still have some more iterating to go on the case design to make something that has a more secure closure. I'm also still sourcing some thumbscrews that will properly fit the case, like these.
Firmware
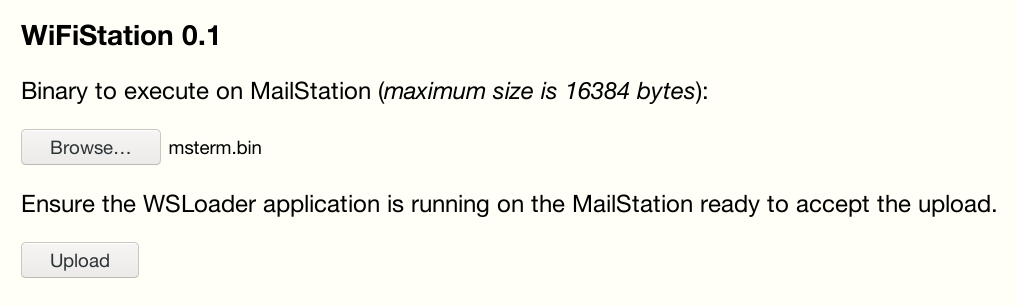
With the hardware design done, I developed more of the firmware to run on the Huzzah ESP8266 board. I integrated a web server which currently just allows uploading a file to be transferred to the new loader program.
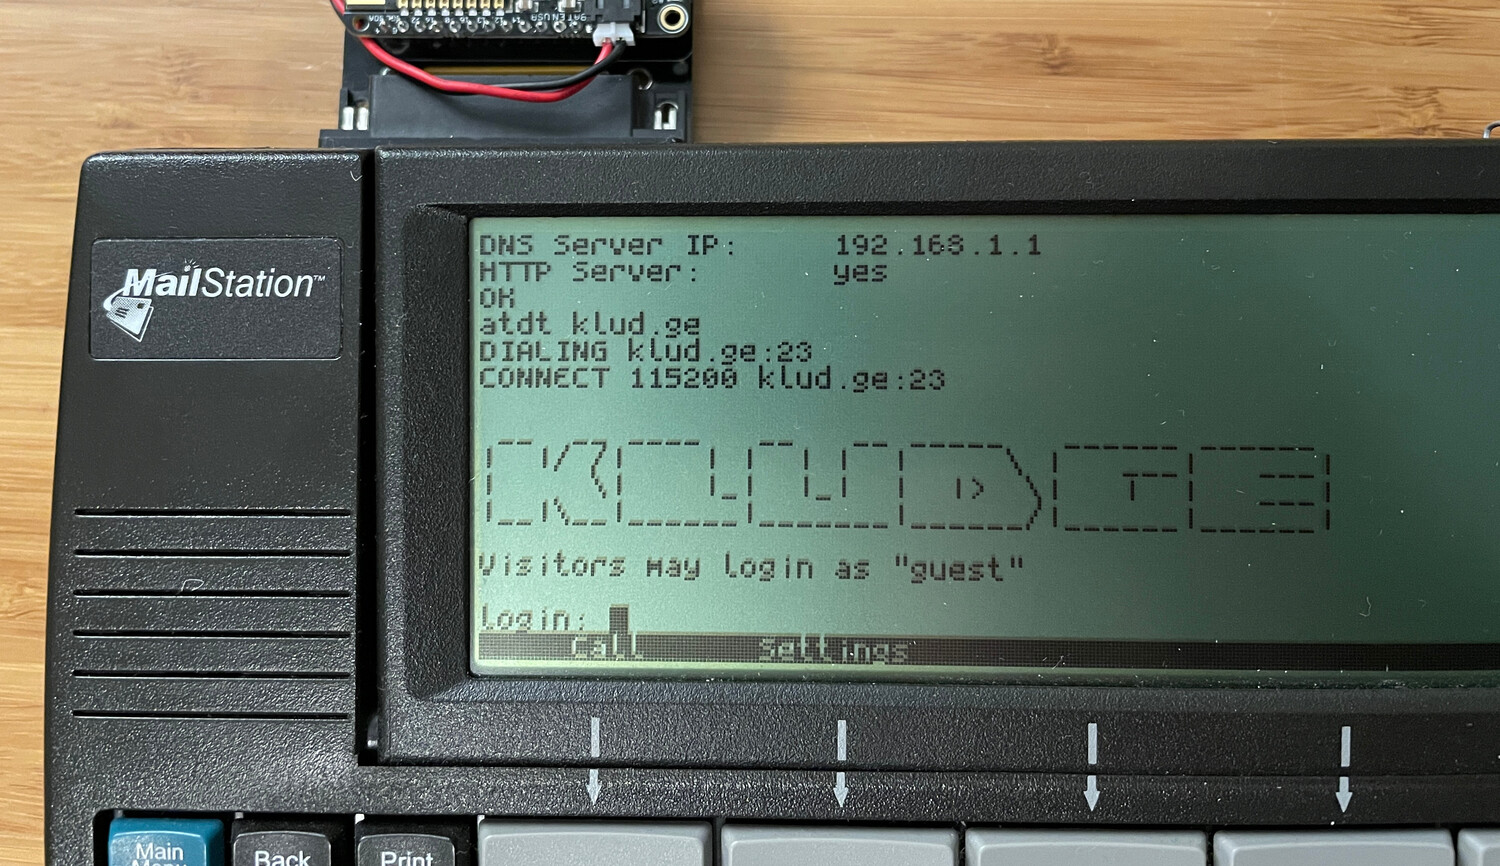
I also improved the telnet/ATDT handling so msTERM can now dial into BBSes
over telnet with proper telnet negotiation, and one do things like +++ ATH to
hang up.
And with the WiFiStation using a battery, this entire thing can be done wirelessly.
WiFiStation Kits
With all of the hardware design nailed down and the software mostly done, I've written up some documentation for the whole system including assembly instructions.
These kits are for sale on Tindie for those interested. I realize the target audience for this is very small but I hope this project brings more attention to the MailStation as a fun Z80 development platform.
-
I know the Dana can connect to a PC with a USB cable and act as a fake keyboard to "type-out" the document, but I think this is pretty cumbersome. ↩