Table of Contents
Back to WiFiStation Documentation
WiFiStation: Hardwiring
Rather than require separate USB power or a separate battery, the WiFiStation can optionally be hardwired to the MailStation to get power from its 9V power supply or 4.5V AA batteries. It will also power off when the MailStation is powered down while still plugged in.
This modification does cause the WiFiStation to be semi-permanently affixed to the MailStation.
Warning: This requires modifying your MailStation which may damage it and/or the WiFiStation.
Step 1: Open MailStation
Remove the battery cover and remove the AA batteries if installed. Remove the 7 screws including one under the battery cover and one under the "Warranty Void if Removed" sticker, now voiding your non-existent warranty.
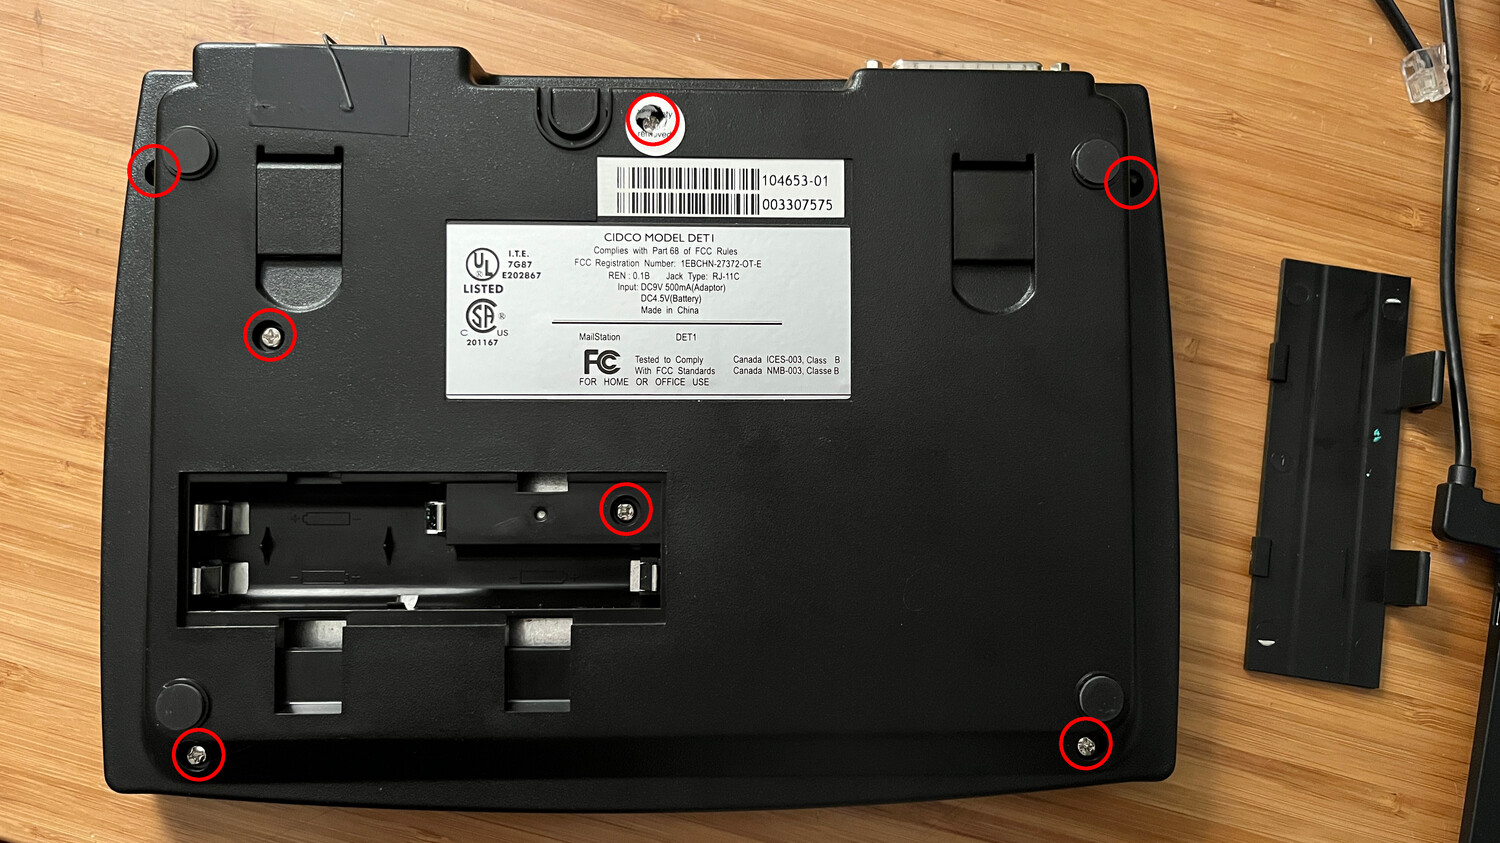
Remove the two nuts on the DB25 port of the MailStation with a nut driver.
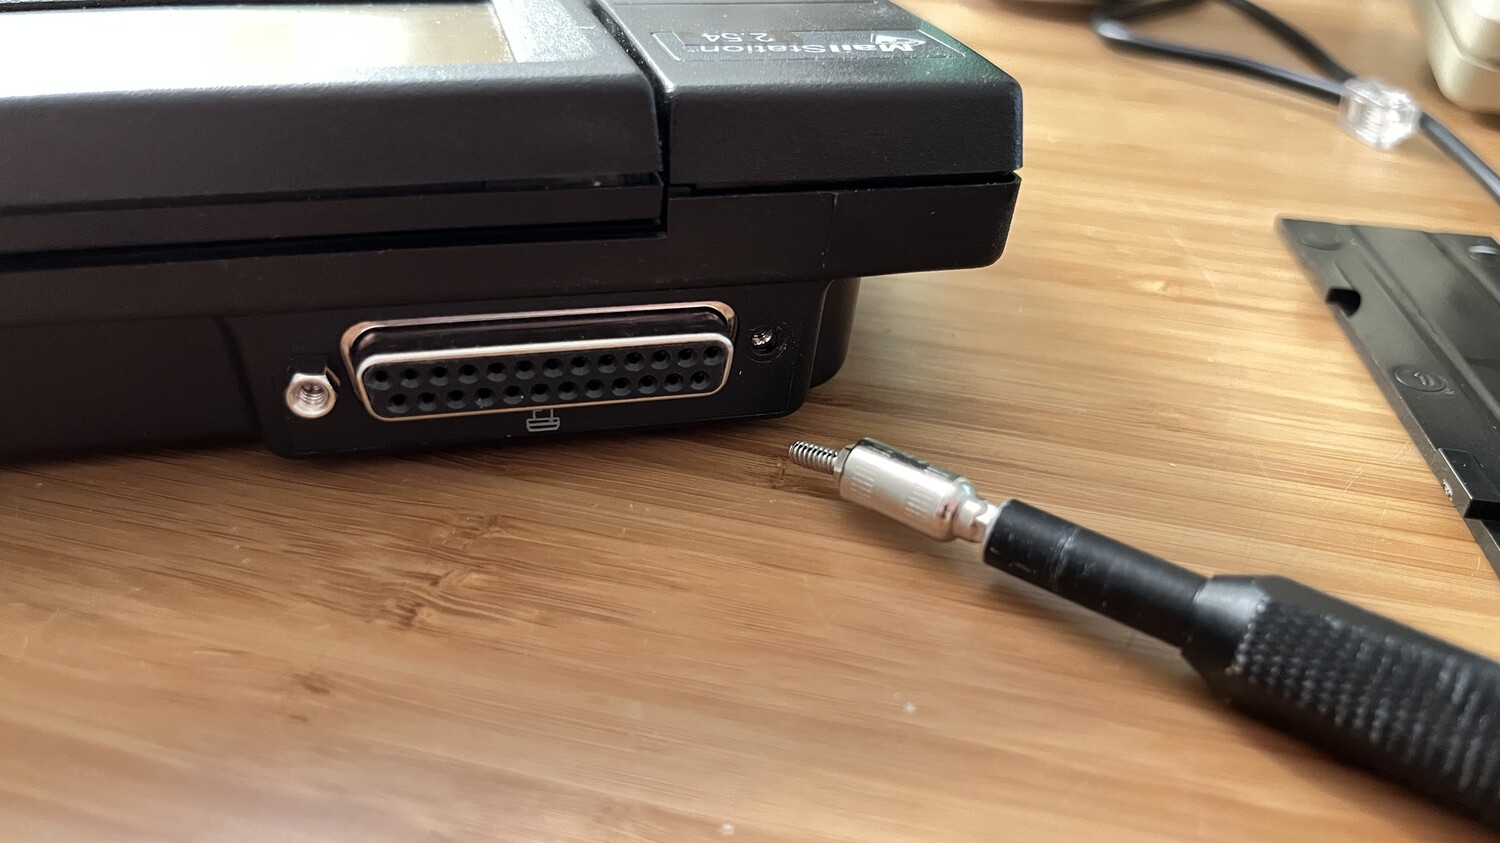
Flip the unit over and lift the bottom cover up and slightly away from you to slide up over the DB25 port. Do not lift the cover too high, as there is a battery cable attached that needs to be unplugged.

Step 2: Solder Leads to MailStation
With the bottom cover off, remove the three screws holding the PCB down, then carefully flip it over with the keyboard cable still attached.
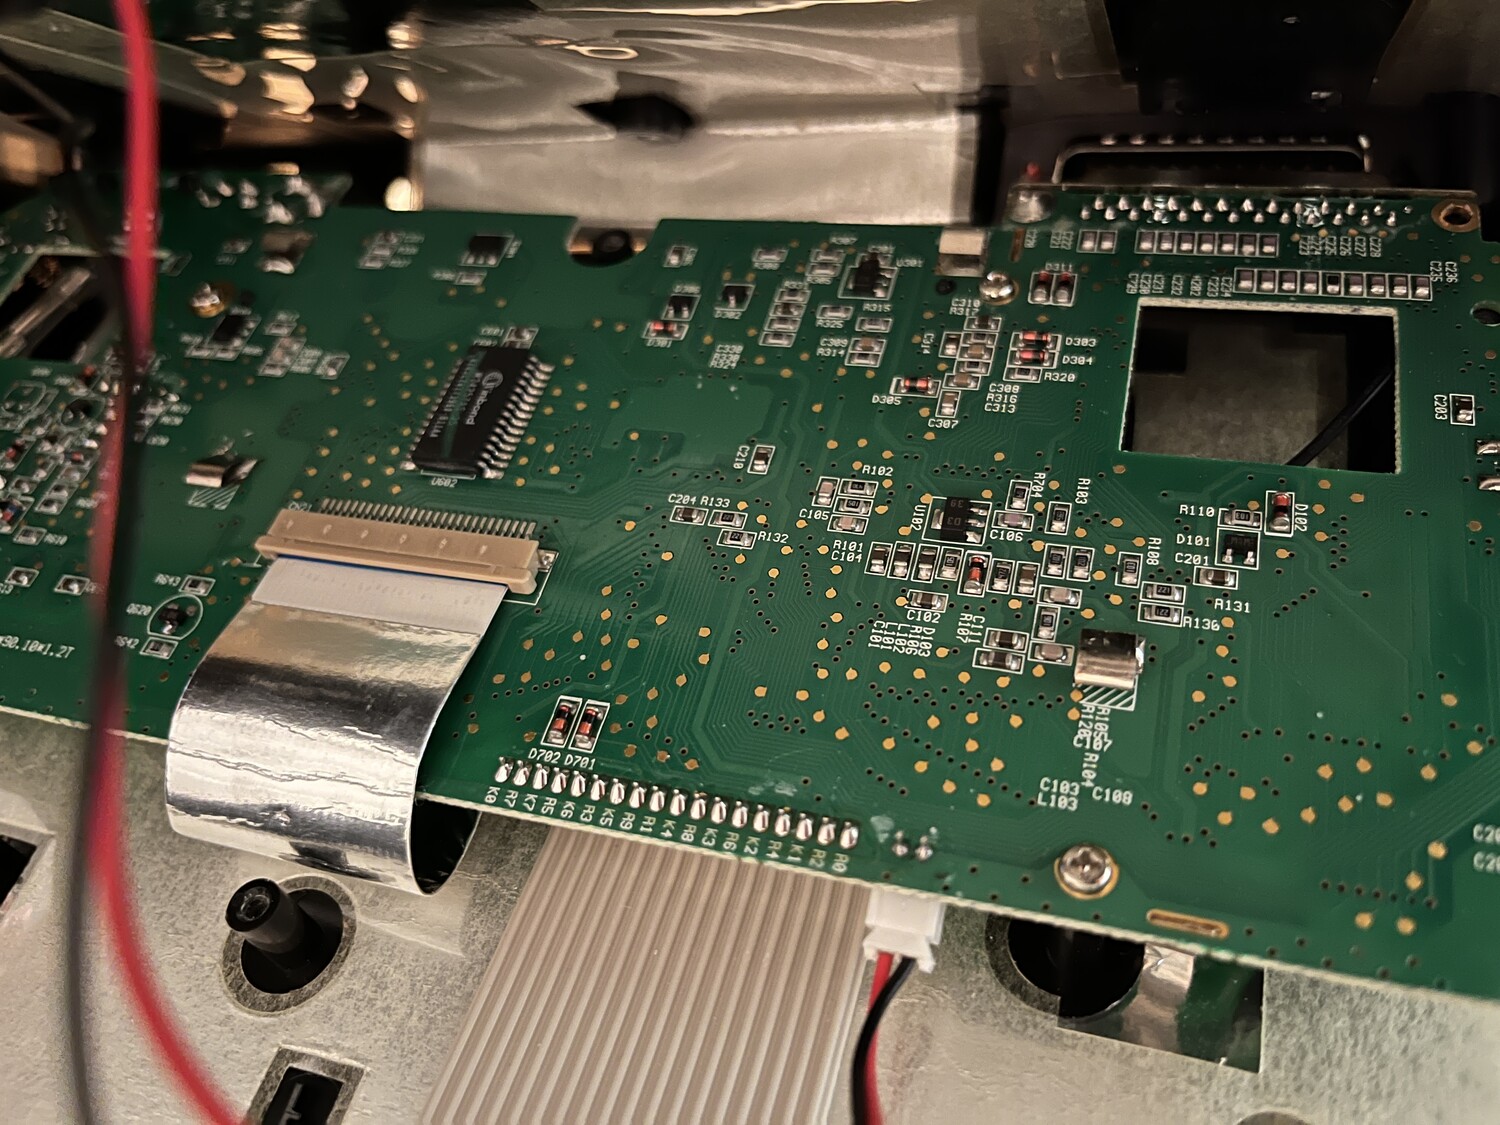
Solder 6-8 inches of insulated wire on both sides of the C303 capacitor shown below, with ground on the left and 5V on the right.
Note: Using power from this source has worked fine for me, but I'm not sure if it's the best place to solder to. If you have other suggestions, please contact me.
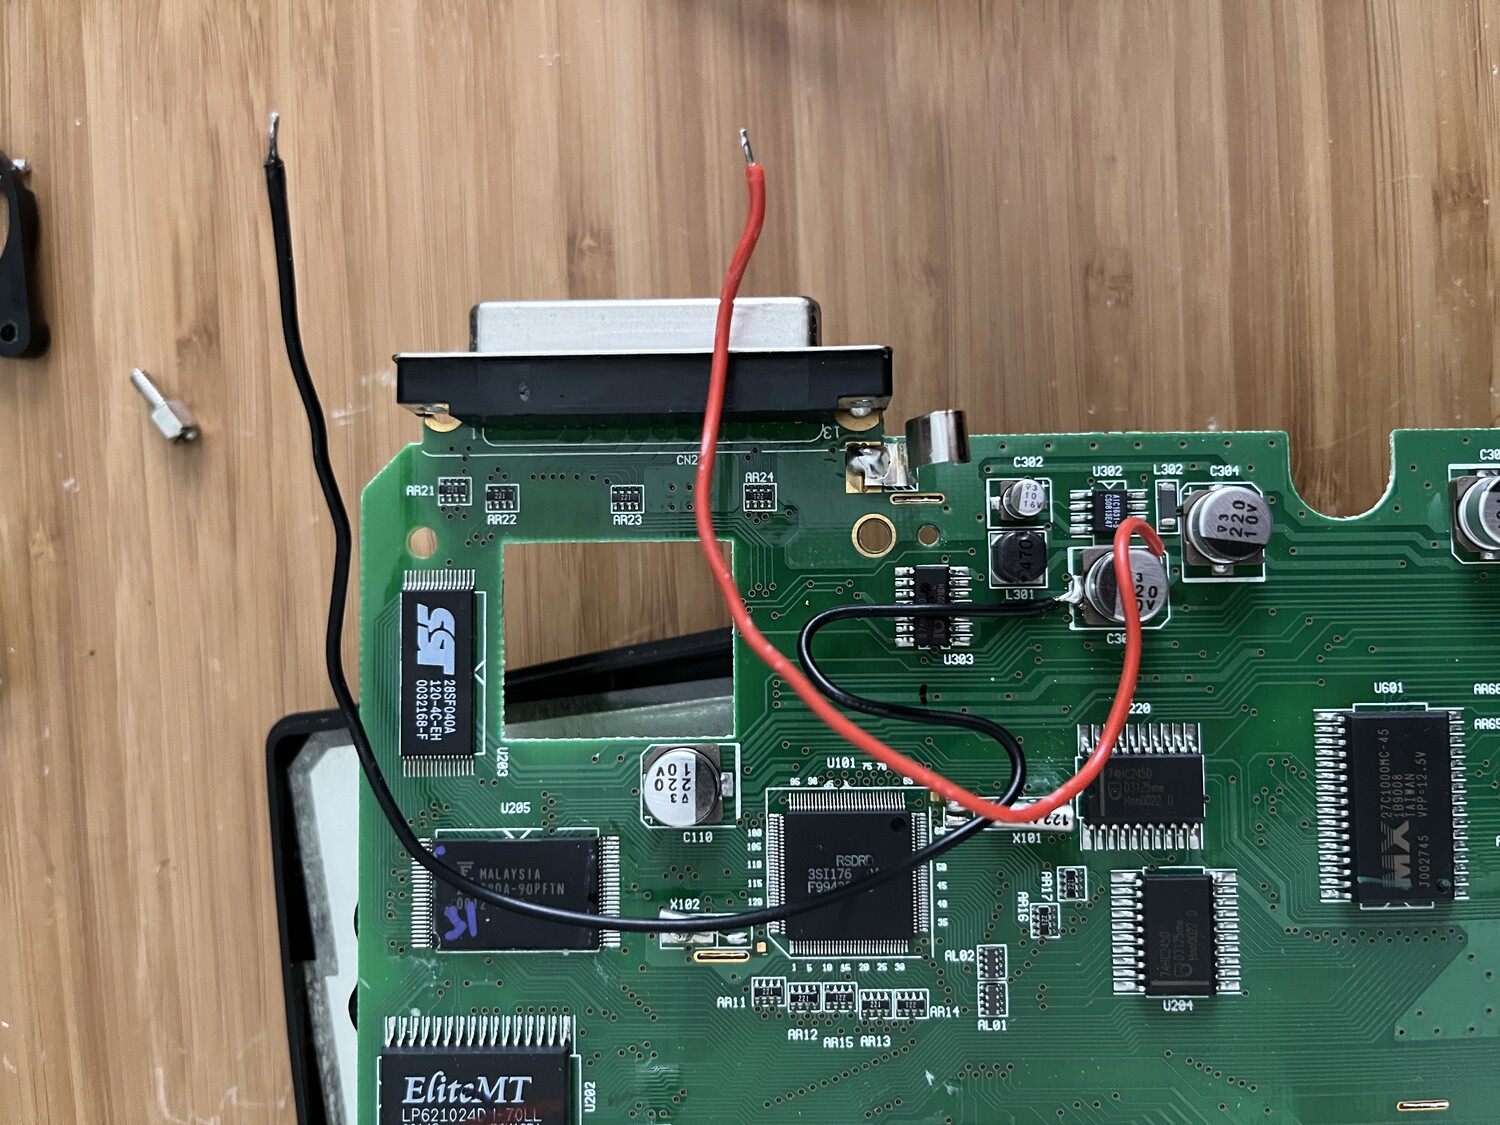
Point the two leads up towards the top of the unit and run them through the holes of the DB25 port.
Step 3: Reattach Case
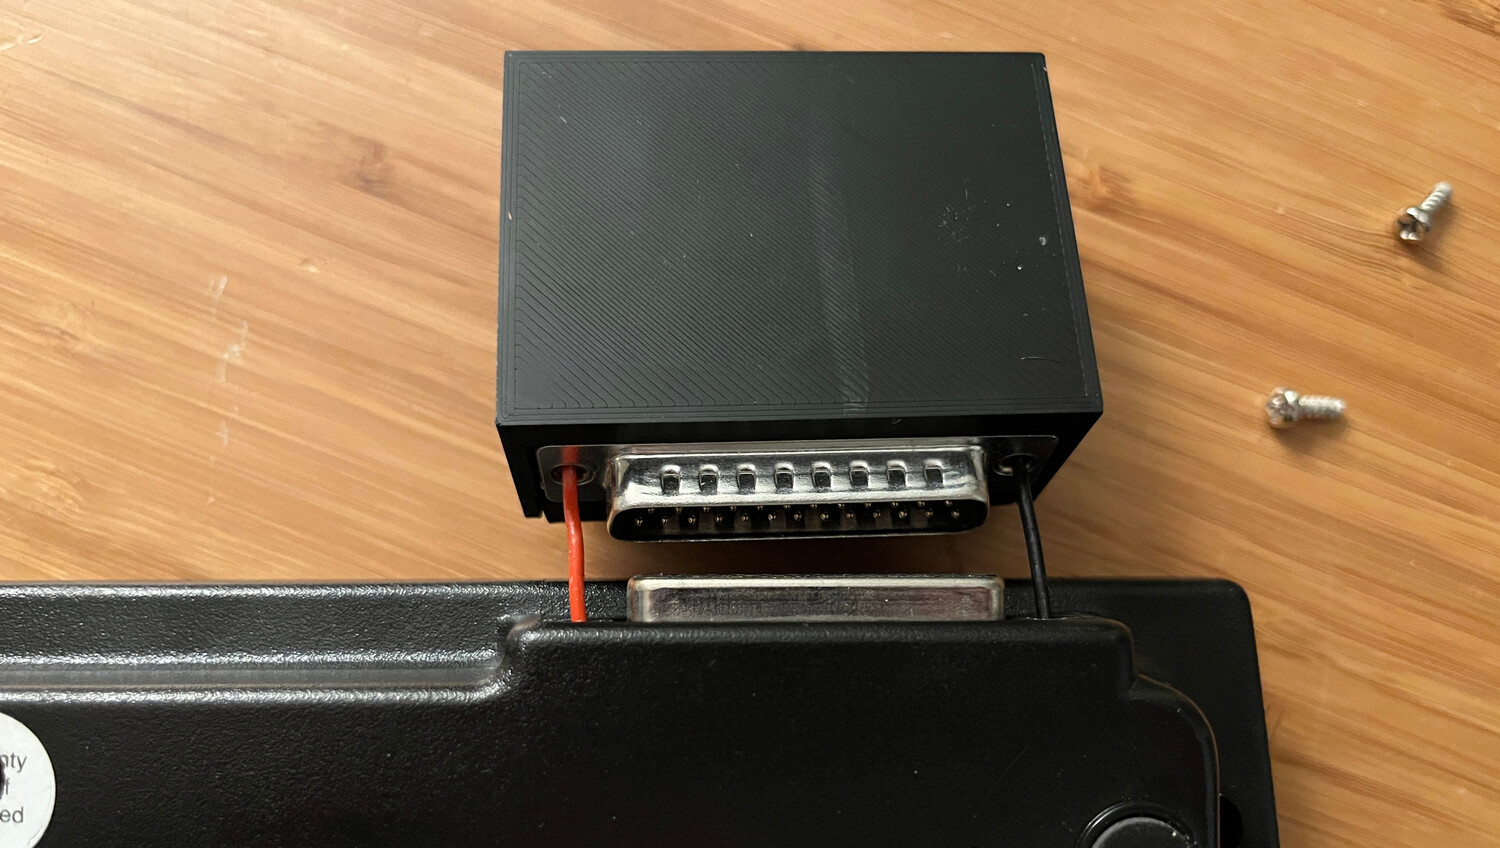
Flip the PCB back over and reattach its three screws. Plug the battery cable back but do not yet install any batteries. Slide the case over the DB25 port and seat it all the way down, then replace the 7 screws.
Run the two leads through the DB25 port of the WiFiStation and then connect the two DB25 ports together. The WiFiStation will now be semi-permanently attached to the MailStation by way of these wires.
Step 4: Solder Leads to WiFiStation
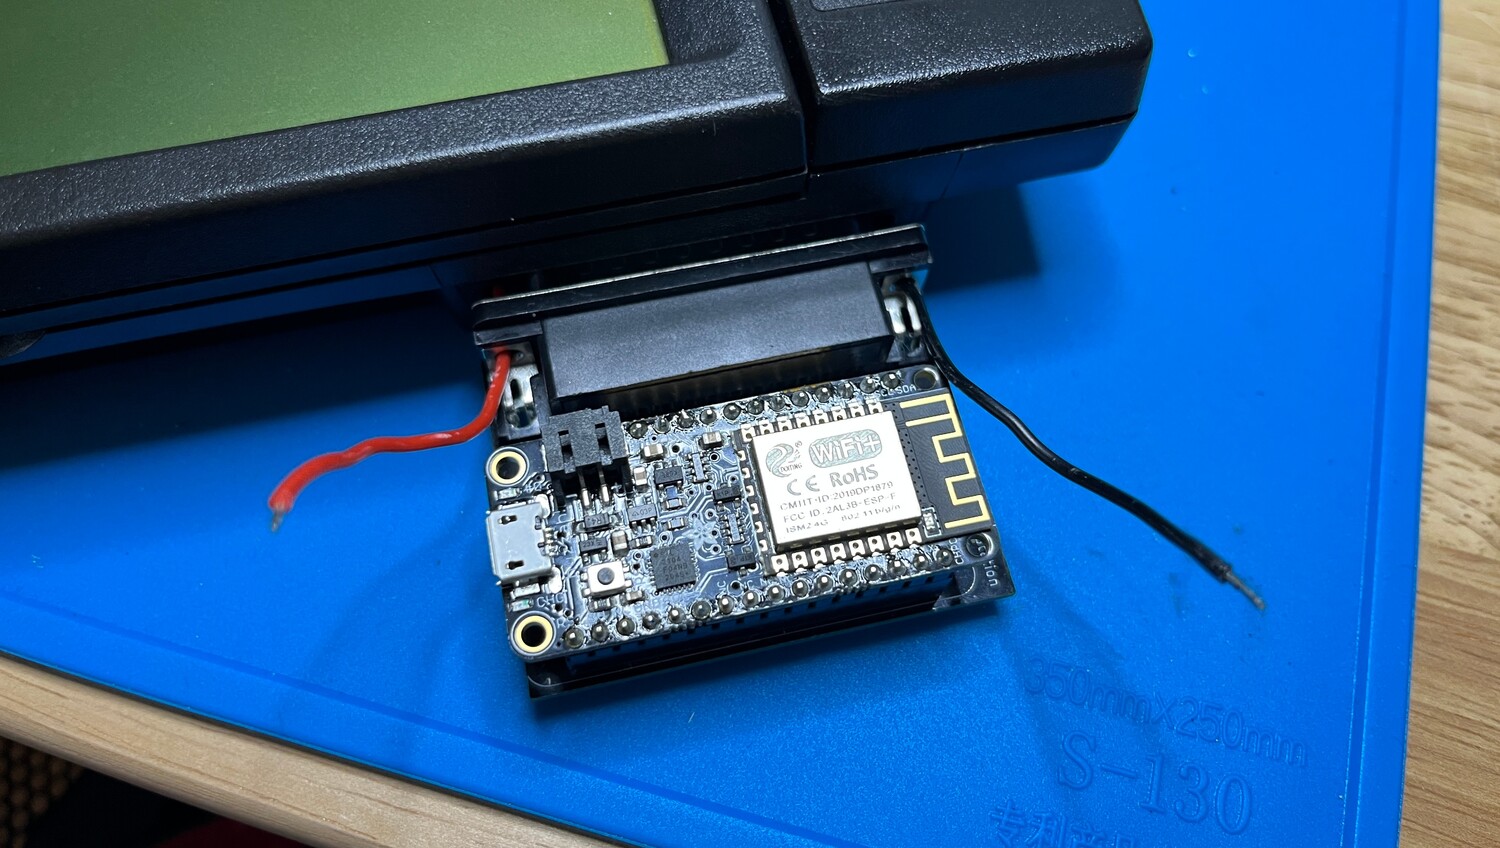
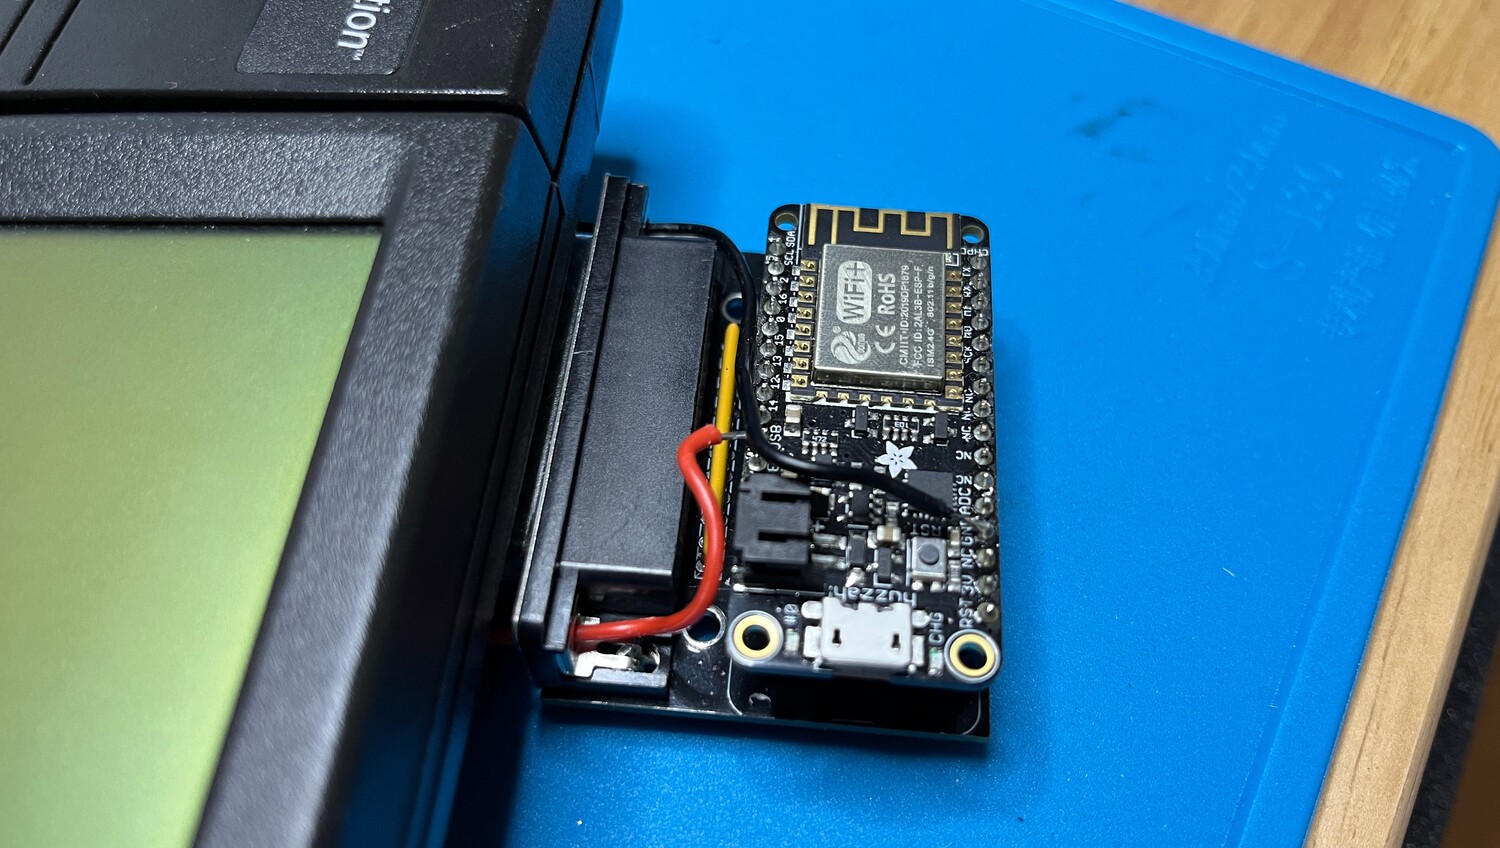
Solder the 5V lead to the USB pin on the Feather Huzzah module, and the
ground lead to the GND pin.
Feed any excess wire back through the DB25 port holes, leaving enough slack not
to strain the leads.
Step 5: Power On and Test
Insert 3 AA batteries and press the Power button. All of the LEDs on the Feather Huzzah module should blink, indicating the board is powered up. Use msTERM to verify communication with the WiFiStation or try to access it over the WiFi network. Then try plugging in AC power and verify that nothing exploded.
When the Power button is pressed again to turn the MailStation off, the WiFiStation will power off as well.
Note: Now that your WiFiStation's Feather Huzzah module has 4.5-5V power feeding out through its USB port, it's important not to plug a USB cable into it while the AC adapter is plugged in or batteries are installed. A new enclosure with no USB port access is available to 3D print, to remind you not to plug it in.
Now your WiFiStation is fully wireless!